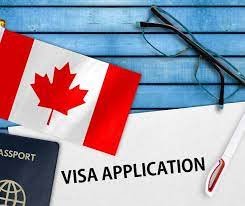
INDIAN VISA FOR ISRAELI and POLISH CITIZENS:
If you’re an Israeli or Polish citizen planning a trip to India, you will need to apply for an Indian visa before your departure. The process for obtaining an Indian visa is relatively straightforward, but it’s essential to follow the correct steps to ensure a smooth application process.
Determining the Type of Visa:
The first step in applying for an Indian visa is determining the type of visa you require based on the purpose of your visit. Whether you’re traveling for tourism, business, or other reasons, there are specific visa categories that cater to your needs. Make sure to carefully review the different visa types and select the one that best suits your travel plans.
Gathering Required Documents:
Once you’ve identified the type of visa you need, the next step is to gather all the necessary documents for your application. This typically includes a completed visa application form, a valid passport, passport-sized photographs, proof of travel arrangements, and any additional documents required for your specific visa category. Be sure to double-check the document requirements to avoid any delays in processing your application.
Submitting Your Application:
After you have compiled all the required documents, you can submit your visa application through the designated application center or online portal. Make sure to pay the applicable visa fees and schedule an appointment for biometric data submission if required. It’s essential to submit your application well in advance of your planned travel dates to allow for sufficient processing time.
Collecting Your Visa and Preparing for Travel:
Once your visa application has been processed and approved, you will receive your Indian visa either through mail or by collecting it in person from the application center. Take note of the validity period and any specific conditions attached to your visa. With your visa in hand, you can now start preparing for your trip to India by booking flights, accommodations, and arranging any other necessary travel arrangements.
By following these steps and ensuring that you have all the required documents in order, you can suc
cessfully obtain your INDIAN VISA FOR ISRAELI CITIZENS or INDIAN VISA FOR POLISH CITIZENS and embark on your Indian adventure with confidence.
Key Takeaways
- Determine the specific purpose of your visit to India and select the appropriate visa type accordingly.
- Gather all required documents, including a valid passport, photographs, and proof of travel arrangements, to ensure a smooth application process.
- Consider applying for an E-Visa online for added convenience and ease of entry into India.
- Schedule an appointment at the nearest visa application center for biometrics and document submission, ensuring all necessary steps are completed in a timely manner.
Determine the Type of Visa You Need
You’ll need to determine the type of visa you need based on your purpose of travel to India. Visa requirements vary depending on whether you are visiting for tourism, business, employment, study, or other reasons. The visa application process for Indian visas can be quite straightforward if you have a clear understanding of your travel purpose.
For Israeli and Polish citizens, the most common types of visas for India include tourist visas, business visas, employment visas, student visas, and e-visas. Each type of visa has specific requirements and conditions that you must meet to be eligible. For example, a tourist visa may require proof of accommodation bookings and a return ticket, while a business visa may necessitate an invitation letter from an Indian company.
To determine the right visa type for your trip, carefully review the information on the official Indian visa website or consult with a visa agency. Once you have identified the type of visa you need, you can begin the application process by completing the online application form and submitting the required documents.
After determining the type of visa you need, the next step is to gather the required documents for your application.
Gather Required Documents
To gather the required documents for your visa application, you’ll need to ensure that your passport has at least 6 months validity remaining.
You’ll also need to have passport-sized photographs ready for submission along with a completed visa application form.
These three key documents are essential for a successful visa application process, so make sure you have them prepared and organized before submitting your application.
Passport with at least 6 months validity
Make sure your passport has at least 6 months of validity before applying for an Indian visa, so you can avoid any last-minute complications. Here is a table to help you understand the visa requirements and application process:
| Visa Requirements | Eligibility | Application Process | Timeline |
|---|---|---|---|
| Valid Passport | Israeli/Polish | Fill out form online | 2-3 weeks |
| Visa Application | Tourist/Business | Schedule appointment | Varies |
| Proof of Finances | No criminal record | Submit documents | 2-3 weeks |
Once you have your passport sorted, the next step is to prepare your passport-sized photographs.
Passport-sized photographs
Ensure your passport-sized photographs meet the specific requirements outlined by the embassy for a smooth application process. When preparing your documents, make sure to adhere to the passport guidelines and photo specifications provided.
Here are some key points to consider:
- The photographs should be recent and in color.
- Your face must be fully visible, with a neutral expression.
- The background should be plain white or light-colored.
- Avoid wearing accessories that may obstruct your face.
- The dimensions of the photographs must match the embassy’s requirements.
Once you have your photographs ready, you can move on to completing the visa application form seamlessly.
Completed visa application form
Before submitting your application, double-check that all sections of the visa form are accurately completed to avoid any delays in processing.
Make sure to fill in all the required fields, including personal information, travel details, and purpose of visit. Incomplete forms can lead to visa processing timeframes being extended, so it’s crucial to be thorough.
Common visa rejection reasons often include missing signatures, incorrect information, or inconsistencies in the application. Providing accurate and honest information is key to a successful visa application.
Once you have completed the form, you can proceed to apply online for the e-visa, simplifying the process and saving time for both you and the consulate.
Apply Online for the E-Visa
To expedite the process, travelers from Israel and Poland can easily apply online for the E-Visa to visit India. The online application process for the Indian E-Visa is simple and convenient, allowing eligible citizens to submit their visa applications from the comfort of their own homes. To be eligible for the E-Visa, travelers from Israel and Poland must meet certain visa eligibility criteria set by the Indian government, such as having a valid passport, a return ticket, and proof of sufficient funds to cover their stay in India.
Applying online for the E-Visa is a hassle-free way to obtain the necessary travel authorization before your trip to India. By completing the online application form accurately and submitting the required documents, you can avoid the need to visit the Indian embassy or consulate in person. Once your E-Visa application is approved, you will receive the visa electronically, allowing you to enter India with ease and convenience.
Schedule an Appointment at the Visa Application Center
When scheduling an appointment at the visa application center, make sure to choose the one nearest to your location for convenience.
You will need to book an appointment for both biometrics and document submission, so be prepared to allocate enough time for the process.
Taking care of this step in advance will help ensure a smooth and efficient visa application process.
Choose the nearest visa application center
Find the nearest visa application center to submit your application for an Indian visa. Here are some key locations to consider:
- Tel Aviv, Israel
- Warsaw, Poland
- Jerusalem, Israel
These centers are equipped to assist you with visa processing and provide guidance on the application center locations.
Once you have chosen the most convenient center for you, it’s time to book an appointment for biometrics and document submission.
Book an appointment for biometrics and document submission
Head over to the nearest visa application center and schedule an appointment for your biometrics and document submission. Make sure to bring all the necessary documents, including your passport, visa application form, and any supporting paperwork.
During your appointment, your biometric requirements will be collected, such as fingerprints and a digital photograph. The staff will also check and accept all your documents for processing.
Once everything is submitted, you can expect the visa processing timeframes to vary, so it’s essential to inquire about the estimated wait time. After completing this step, you will be ready to attend the visa interview to finalize your application.
Attend the Visa Interview
Make sure to prepare all necessary documents for your visa interview to ensure a smooth process. The interview is a crucial step in the visa application process, and being well-prepared can increase your chances of visa approval. Here are some key points to keep in mind as you get ready for your visa interview:
Visa Interview Preparation
- Documentation: Bring all the required documents, including your passport, visa application form, appointment confirmation, and any supporting documents.
- Dress Code: Dress formally and professionally for the interview.
- Interview Etiquette: Be polite, respectful, and honest during the interview.
- Practice: Consider practicing common interview questions to feel more confident.
While attending the visa interview, remember to stay calm and answer all questions truthfully. By following these tips, you can increase your chances of a successful visa approval.
Transitioning into the next section, after attending the visa interview, the next step is to wait for visa approval.
Wait for Visa Approval
After attending the visa interview, you must now wait for visa approval. The visa processing can take some time, so it’s essential to be patient during this period. While waiting, you can check the status updates on the visa application portal to stay informed about any developments.
During this waiting time, there are a few things you can do to pass the time and stay prepared for your upcoming travel:
- Research about the destination country and familiarize yourself with its customs and culture.
- Start packing your bags and organizing your travel documents to ensure a smooth journey.
- Make any necessary arrangements for accommodation and transportation once your visa is approved.
As you wait for the visa approval, remember to stay positive and hopeful. The process may seem lengthy, but the outcome will be worth it once you receive that coveted visa in your hands.
Transitioning into the subsequent section about ‘collect your visa and prepare for travel,’ you will soon receive notification of your visa approval and be ready to embark on your journey to the exciting destination.
Collect Your Visa and Prepare for Travel
Once you receive the exciting news of your visa approval, it’s time to gather your travel essentials and get ready for the adventure ahead! Make sure to collect your visa from the designated location and double-check all the details to ensure a smooth journey. Here are some packing essentials and cultural etiquette tips to keep in mind before your trip to India:
| Packing Essentials | Cultural Etiquette |
|---|---|
| Valid passport | Respect local customs |
| Visa documents | Dress modestly |
| Travel itinerary | Remove shoes before entering temples |
| Comfortable clothing | Use your right hand for eating and greeting |
| Travel adapters | Avoid public displays of affection |
When packing, remember to pack light but efficiently, considering the weather and activities you have planned. It’s essential to respect Indian customs and traditions during your stay. Be mindful of cultural etiquette, such as dressing modestly, removing your shoes before entering religious sites, and using your right hand for eating and greeting others. Additionally, avoid public displays of affection, as it may not be well-received in some areas. By being aware of these cultural norms, you can show respect for the local traditions and make the most of your Indian adventure. Get ready to immerse yourself in the vibrant culture, delicious cuisine, and rich history that India has to offer!
Frequently Asked Questions
Can Israeli and Polish citizens apply for an Indian visa online?
Yes, Israeli and Polish citizens can apply for an Indian visa online. The visa processing for both nationalities is done through the online application system, making it convenient and efficient for travelers.
Are there any specific requirements for Israeli and Polish citizens when applying for an Indian visa?
When applying for an Indian visa, Israeli and Polish citizens must meet specific requirements. Ensure you have all necessary documentation, follow the visa application process, and be aware of any consular assistance or travel advisories.
How long does the visa approval process typically take for Israeli and Polish citizens?
The processing time for Indian visas for Israeli and Polish citizens typically takes about 2-4 weeks. Visa fees vary based on the type of visa. Supporting documents and a visa interview may be required.
Are there any restrictions on the duration or type of visa Israeli and Polish citizens can apply for?
You can apply for different visa duration options, ranging from short-term to long-term stays. As an Israeli or Polish citizen, you have access to various visa types such as tourist, business, student, and medical visas.
What should Israeli and Polish citizens do if their visa application is denied?
If your visa application is denied, you can explore the appeal process to try and overturn the decision. Alternatively, consider looking into travel alternatives that may not require a visa for Israeli and Polish citizens.
Conclusion
Now that you have completed all the necessary steps for obtaining an Indian visa, all that’s left to do is collect your visa and get ready for your trip.
Make sure to double-check all your documents, pack your bags, and prepare for an amazing experience in India.
Remember to follow all the rules and regulations during your stay and have a wonderful time exploring all that this incredible country has to offer.
Safe travels!